


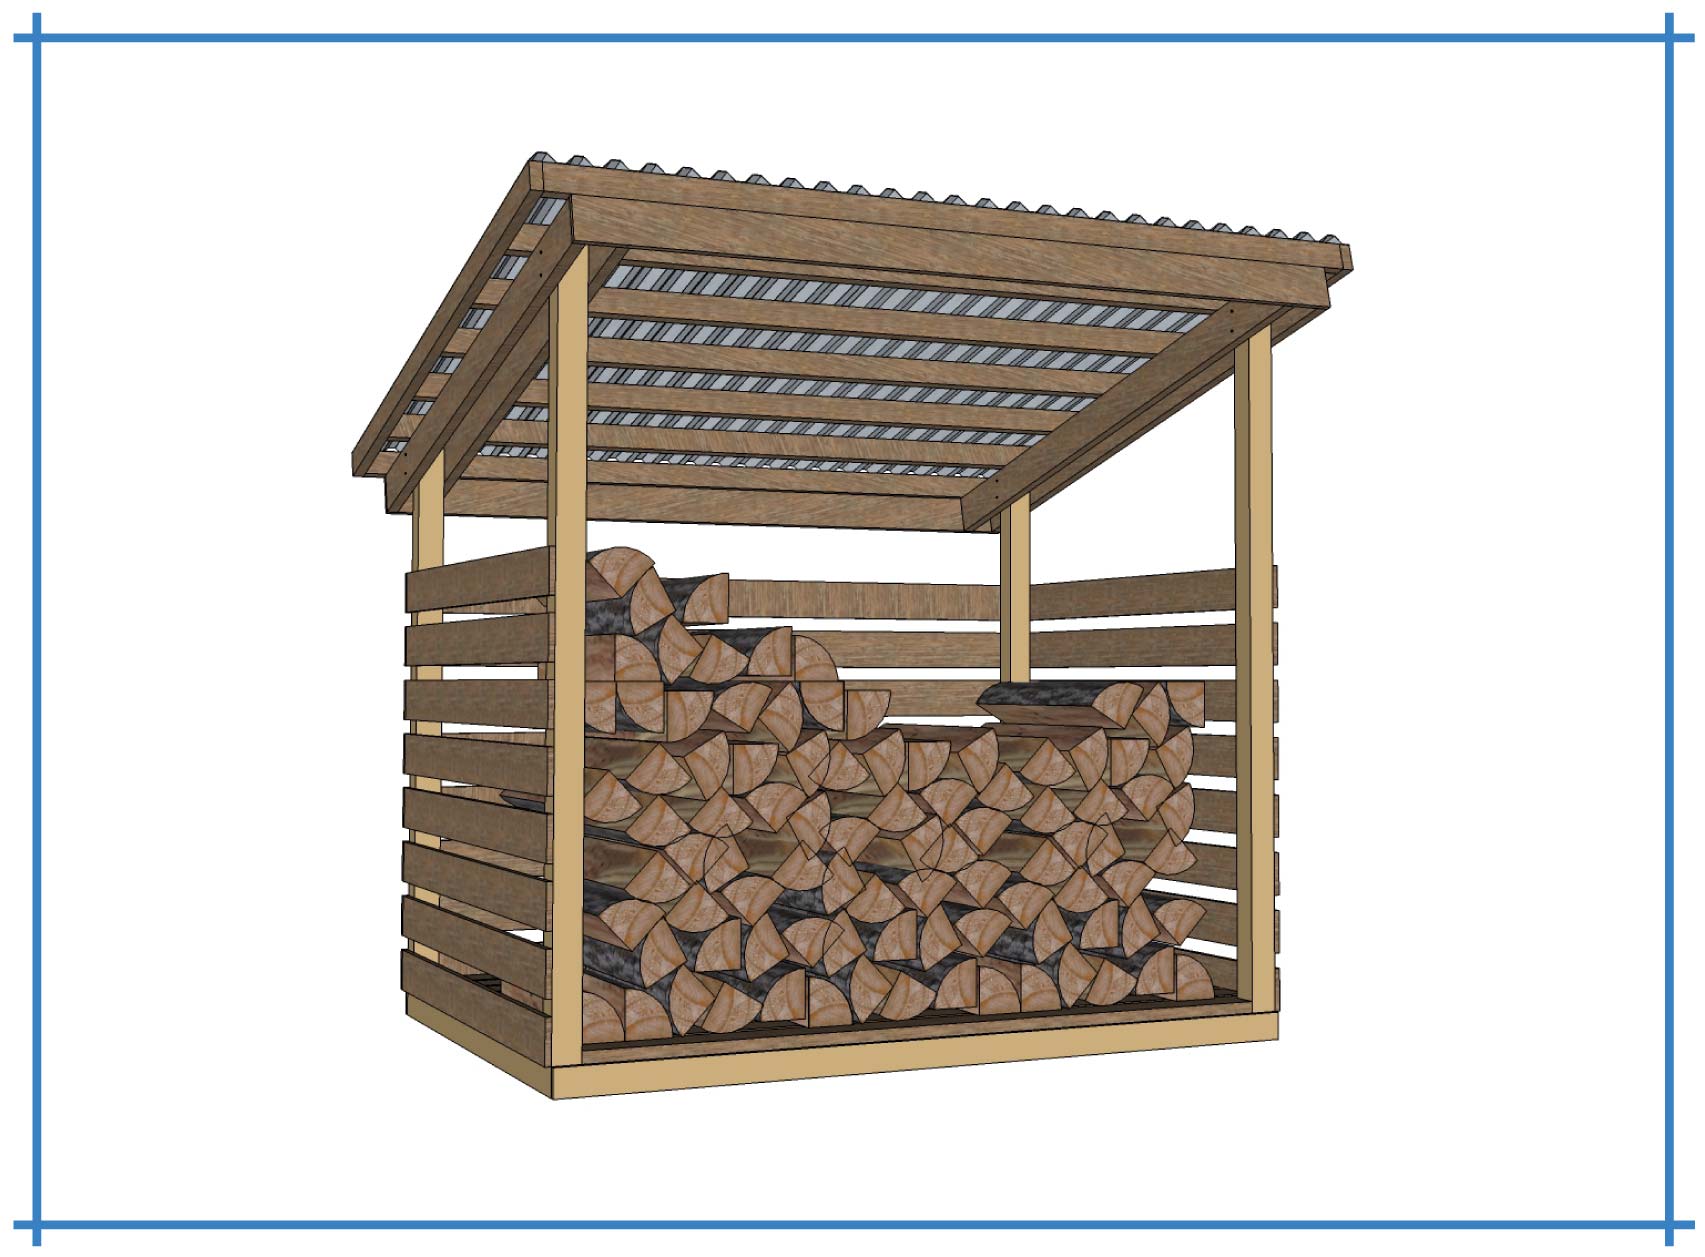
Constructing a Durable 8x6 Wood Shed on a Budget
This document provides a comprehensive guide to building a robust and affordable 8x6 wood shed. The plans emphasize cost-effectiveness while maintaining structural integrity and longevity. Detailed steps, material lists, and considerations for budget management are included to ensure a successful project for even novice builders.
Phase 1: Planning and Preparation
Site Selection and Preparation
Choosing the right location is crucial. Consider factors such as:
- Accessibility: Ensure easy access for material delivery and future use.
- Sunlight and Shade: Balance sufficient sunlight for drying and adequate shade to prevent overheating.
- Drainage: Select a level location with good drainage to prevent water accumulation and foundation issues. A slight slope away from the shed is ideal.
- Local Regulations: Check with your local authorities regarding building permits, setbacks, and other regulations.
Once the location is finalized, prepare the site by clearing vegetation, leveling the ground, and removing any debris. A level base is paramount for a stable structure. Consider using a spirit level and potentially compacting the soil for a more solid foundation.
Material Selection and Cost Optimization
Careful material selection is key to staying within budget. Prioritize cost-effective options without compromising quality. This includes:
- Pressure-Treated Lumber: Opt for pressure-treated lumber for the foundation and base framing to withstand ground contact and moisture. This adds to the longevity of the shed and reduces the need for frequent repairs.
- Untreated Lumber for Walls and Roof: Untreated lumber is suitable for the walls and roof, provided it's properly protected with paint or sealant. This is a more economical choice compared to using pressure-treated lumber for the entire structure.
- Roofing Materials: Consider cost-effective roofing options such as asphalt shingles or corrugated metal sheets. These offer a good balance between affordability and durability. Avoid expensive, high-end roofing materials to save significantly.
- Hardware: Source hardware such as screws, nails, and hinges from wholesale suppliers or discount stores. Purchasing in bulk can often result in considerable savings.
Create a detailed material list with quantities and estimated costs from multiple suppliers to compare pricing and find the best deals. Consider sourcing reclaimed or recycled materials where appropriate to further reduce costs.
Tool Acquisition and Rental
Assess the tools you own and identify those that need to be rented or purchased. Essential tools include:
- Measuring Tape and Level: Crucial for accurate measurements and ensuring a level structure.
- Shovel and Post Hole Digger: Necessary for site preparation and foundation construction.
- Circular Saw and Drill: Required for cutting lumber and securing fasteners.
- Hammer and Screwdriver: For general construction tasks.
- Safety Equipment: Essential for protecting yourself during the construction process, including safety glasses, work gloves, and hearing protection.
Consider renting power tools if you don't own them. This can be significantly more cost-effective than purchasing them, especially for a one-time project. Prioritize safety by utilizing appropriate safety gear throughout the construction process.
Phase 2: Construction
Foundation Construction
A solid foundation is critical. Consider the following options:
- Concrete Slab: Provides a strong and level base but is the most expensive option.
- Gravel Base: A more cost-effective option involving a compacted gravel layer. Ensure proper drainage is implemented.
- Concrete Blocks: Offer a balance between cost and stability. Ensure they are level and aligned.
Regardless of the chosen method, ensure the foundation is level and extends beyond the shed's perimeter for added stability. Proper drainage should be incorporated to prevent water damage.
Framing the Floor and Walls
The floor framing involves laying pressure-treated lumber joists and decking. Ensure the joists are spaced appropriately and securely fastened to the foundation. The wall framing involves constructing rectangular frames using pressure-treated lumber for the base and untreated lumber for the upper sections. Proper bracing is essential for structural integrity. Remember to account for door and window openings during framing.
Roof Construction
The roof design should be simple and cost-effective. A gable roof is a good choice. Construct the roof trusses or rafters and attach them securely to the top wall plates. Install sheathing, roofing felt, and your chosen roofing material. Ensure proper ventilation to prevent moisture buildup. Proper flashing should be applied at all intersections to prevent water infiltration.
Sheathing and Siding
Apply sheathing to the exterior walls for added strength and weather resistance. This can be plywood or OSB (Oriented Strand Board). Install the chosen siding material, ensuring proper overlap and sealing to prevent water intrusion. This could include inexpensive options like vinyl or treated plywood siding.
Door and Window Installation
Install the door and any windows, ensuring they are properly sealed and weatherproofed. Use appropriate hardware and ensure the door and windows operate smoothly.
Phase 3: Finishing Touches and Considerations
Painting and Sealing
Apply a protective coat of paint or sealant to the exterior wood to protect it from the elements. This significantly extends the life of the shed and maintains its appearance. Consider using weather-resistant paint or stain.
Interior Finishing
If desired, add interior finishing touches such as shelving, lighting, and flooring. This can be customized based on intended use and budget.
Budget Management and Contingency
Maintain a detailed budget throughout the project, tracking all expenses. Include a contingency of at least 10-15% of the total estimated cost to account for unforeseen expenses or material price fluctuations.
By following these detailed plans and adhering to a structured budget, building a durable and affordable 8x6 wood shed becomes a manageable and rewarding project. Remember to prioritize safety and take your time to ensure quality workmanship.


No comments:
Post a Comment
Note: Only a member of this blog may post a comment.