


Maximize Space in Your Yard with These 6x8 Gable Shed Plans
A 6x8 gable shed offers a surprising amount of storage space, perfect for a variety of uses. Whether you need to store gardening equipment, outdoor furniture, or simply declutter your home, a well-designed shed can significantly enhance your property's functionality and aesthetic appeal. This comprehensive guide provides detailed plans and considerations for constructing your own 6x8 gable shed, maximizing its utility and longevity.
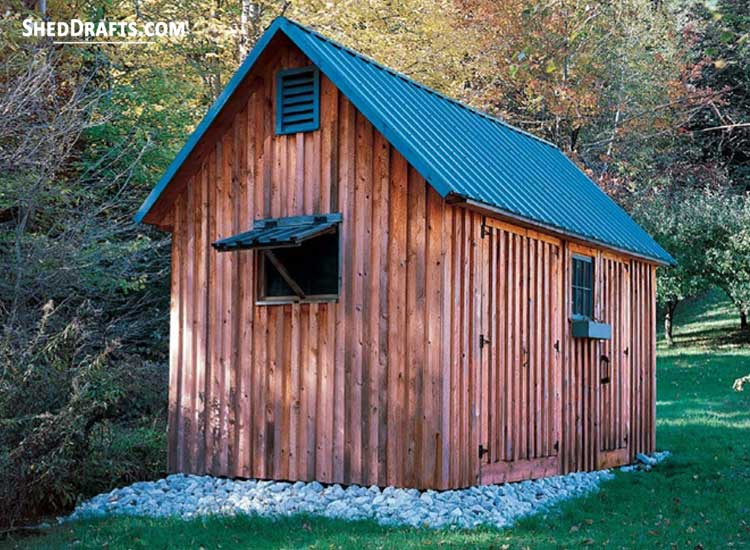
Understanding the Advantages of a 6x8 Gable Shed
The dimensions of a 6x8 shed represent a sweet spot in terms of practicality and footprint. It's large enough to be genuinely useful, yet compact enough to fit comfortably in most yards without overwhelming the landscape. The gable roof design, characterized by its triangular shape, offers several key advantages:
Increased Headroom and Interior Space
The peaked roof of a gable shed provides ample headroom, making it easier to move around inside and store taller items. This is significantly superior to a shed with a flat or lean-to roof, which tends to have limited vertical space.
Enhanced Weather Resistance
The sloped design of a gable roof allows for efficient water runoff, reducing the risk of water damage and leaks. This contributes to the overall durability and longevity of the shed, protecting its contents from the elements.
Improved Ventilation
The gable design naturally encourages air circulation within the shed, helping to prevent the buildup of moisture and mildew. This is crucial for preventing damage to stored items and maintaining a dry and healthy interior environment.
Detailed 6x8 Gable Shed Plans: Foundation and Framing
Constructing a sturdy and functional 6x8 gable shed requires careful planning and execution. Below are detailed instructions for the foundation and framing stages.
Foundation Construction: Preparing the Ground
The foundation forms the bedrock of your shed, ensuring stability and preventing settling. Options include a concrete slab, gravel base, or pressure-treated lumber base. For a 6x8 shed, a gravel base or pressure-treated lumber base often offers a cost-effective solution. Begin by clearing the area and leveling the ground thoroughly. If using gravel, create a 4-inch deep base, compacting it firmly. For a lumber base, construct a frame from pressure-treated 4x4 lumber, ensuring a level and square foundation.
Framing the Walls and Roof: Precise Measurements are Crucial
Framing forms the structural skeleton of your shed. Use pressure-treated lumber for the base plates and floor joists, and standard lumber for the wall studs and roof rafters. Precise measurements are critical at this stage to ensure a structurally sound and aesthetically pleasing shed. For the walls, use 2x4 studs spaced 16 inches on center. For the roof, calculate the rafter length based on the desired roof pitch and ensure proper overhang. Consider using a rafter square to accurately determine cuts. Always double-check your measurements before making any cuts.
Sheathing and Roofing: Protecting Your Investment
Once the framing is complete, apply sheathing to the walls and roof. Oriented strand board (OSB) or plywood are common choices. Properly fasten the sheathing to the framing for maximum structural integrity. Next, install the roofing material. Asphalt shingles are a cost-effective and widely available option. Ensure proper overlap and secure fastening to protect the shed from the elements. Remember to use appropriate flashing around vents and other penetrations to prevent leaks.
Essential Features to Maximize Space and Functionality
Even a small 6x8 shed can be highly functional with careful planning. Incorporating certain features will maximize your storage space and overall usability.
Interior Shelving and Organization
Maximize vertical space by installing shelving units. Consider the types of items you'll be storing to determine the optimal shelving height and configuration. Adjustable shelving offers flexibility, while fixed shelving can provide a more robust solution for heavier items. Use clear storage bins to keep things organized and easily accessible.
Door Placement and Size
Strategic door placement is crucial. A single door on the narrow side offers maximum wall space for shelving, while a double door on the longer side provides easier access for larger items. Consider the size and weight of the items you will be moving in and out of the shed when selecting the door size.
Ventilation and Lighting
Adequate ventilation prevents moisture buildup, crucial for preserving stored items. Include vents near the roofline and potentially at the base of the walls. Consider installing a window to improve natural light and ventilation. Supplement this with artificial lighting for evening use. Solar-powered LED lights are an environmentally friendly and cost-effective option.
Workbenches and Hooks
Depending on intended use, incorporating a small workbench can transform your shed into a practical workshop or hobby space. Installing hooks on the walls provides extra storage for tools and other small items, freeing up valuable shelf space.
Choosing the Right Materials: Durability and Cost-Effectiveness
Material selection significantly impacts the shed's longevity and overall cost. Careful consideration of material properties and cost-effectiveness is essential.
Permitting and Safety Considerations
Before starting construction, check with your local authorities regarding building permits and regulations. Adhering to local codes ensures your shed meets safety standards and avoids potential legal issues. Always prioritize safety during the construction process. Wear appropriate safety gear, including eye protection, gloves, and hearing protection. Use proper lifting techniques and ensure the stability of the structure at each stage of construction.
Following these detailed plans and considerations will allow you to construct a functional and durable 6x8 gable shed, maximizing the usable space in your yard and enhancing both its practicality and aesthetic appeal. Remember that careful planning and execution are key to a successful project.


No comments:
Post a Comment
Note: Only a member of this blog may post a comment.