


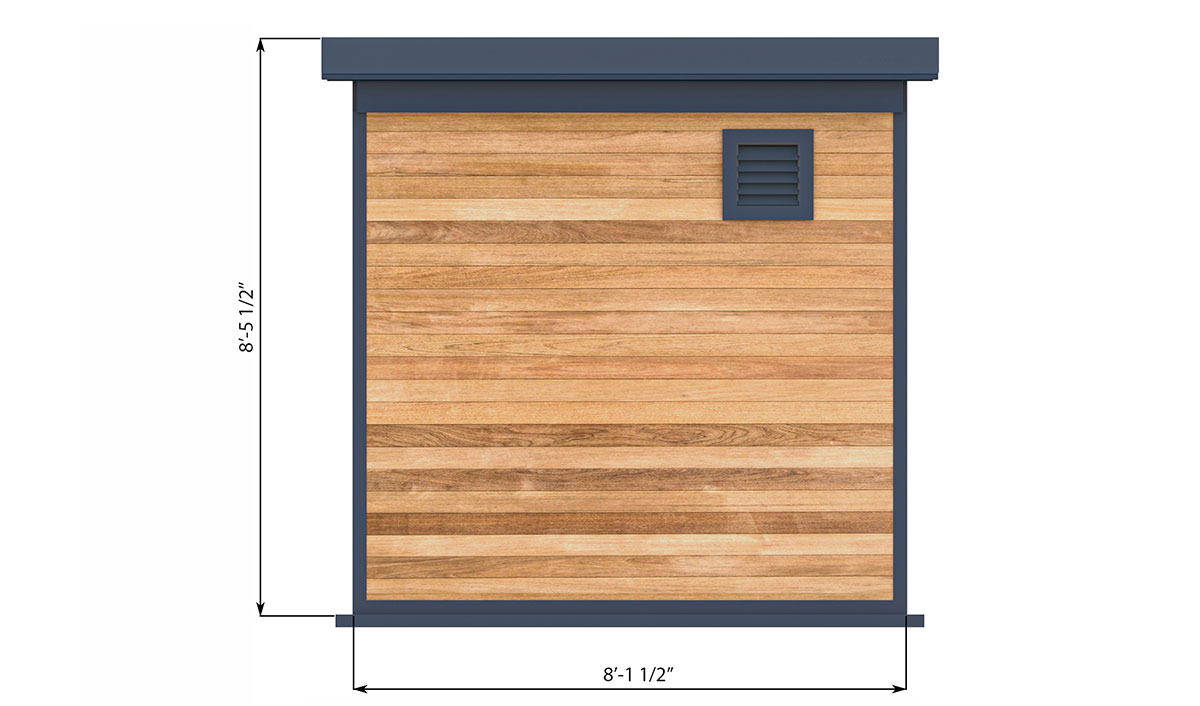
Practical 6x8 Shed Building Plans for Storing Tools and Equipment
This document provides comprehensive building plans for a 6x8 foot shed, ideal for storing tools and equipment. The design prioritizes practicality, affordability, and ease of construction for individuals with moderate DIY skills. While professional assistance may be beneficial for certain stages, the detailed instructions aim to guide you through the entire process.
I. Planning and Preparation
A. Site Selection and Preparation
Choosing the appropriate location is crucial. Consider factors such as:
- Accessibility: Ensure easy access for transporting materials and later retrieving stored items.
- Ground Conditions: Level ground is essential for a stable foundation. Assess drainage to prevent water accumulation.
- Sun Exposure and Wind: Consider prevailing winds and sun exposure to optimize ventilation and minimize material degradation.
- Local Regulations: Check with your local authorities for building permits, setbacks, and zoning restrictions.
Once the site is chosen, clear the area of vegetation, debris, and any potential obstructions. Level the ground using a shovel and rake, aiming for a flat, compacted surface.
B. Material Selection and Quantity Estimation
Accurate material estimation prevents delays and cost overruns. The following list provides a guideline for a 6x8 shed; adjust quantities based on your specific design choices.
- Pressure-Treated Lumber: 4x4 posts for the foundation (8), 2x4s for the framing (approximately 100 linear feet), and 2x6s for the floor joists (approximately 20 linear feet). Consider using longer lengths to minimize joints.
- Plywood or OSB Sheathing: Sufficient to cover the walls and roof (calculate based on shed dimensions). Use exterior-grade plywood or OSB.
- Roofing Material: Asphalt shingles, metal roofing, or other suitable material. Calculate the area of the roof to determine the required quantity.
- Fasteners: Galvanized nails, screws, and appropriate connectors for framing.
- Concrete Mix (for foundation): The amount depends on the chosen foundation type. A concrete slab is recommended for stability.
- Door and Window Materials: Select pre-hung doors and windows for ease of installation. A single door is sufficient for a 6x8 shed, but a window can improve ventilation and lighting.
C. Tool Acquisition and Safety Precautions
Ensure you have the necessary tools before commencing construction. This includes:
- Measuring Tools: Tape measure, level, square.
- Cutting Tools: Circular saw, hand saw, reciprocating saw.
- Fastening Tools: Hammer, drill, screw gun.
- Other Tools: Shovels, rakes, post-hole digger (if using post foundation), wheelbarrow.
Safety is paramount. Wear appropriate safety gear including safety glasses, gloves, hearing protection, and sturdy work boots throughout the construction process. Follow all tool manufacturer safety guidelines.
II. Foundation Construction
A stable foundation is crucial for a long-lasting shed. Two common foundation types are described below:
A. Concrete Slab Foundation
This provides a robust and level base. Excavate the area to a depth of approximately 6 inches. Create a formwork using lumber to contain the concrete. Pour and level the concrete mix, ensuring it’s compacted properly. Allow ample curing time (typically 24-48 hours) before proceeding.
B. Pier and Beam Foundation
This option is suitable for well-drained soil. Dig holes for the piers (4x4 posts) at each corner and along the sides, spaced approximately 4 feet apart. Set the posts in concrete and ensure they are plumb and level. Use pressure-treated lumber for the beams connecting the posts.
III. Framing and Wall Construction
Precise framing is vital for a square and sturdy shed. The following steps outline the process:
A. Floor Framing
Construct a frame using 2x6 joists laid across the foundation, spaced approximately 16 inches apart. Secure them to the foundation using appropriate fasteners. Install plywood or OSB sheathing for the floor.
B. Wall Framing
Build wall frames using 2x4s, following the dimensions of the shed. Ensure the frames are square and plumb. Attach the wall frames to the floor frame using appropriate fasteners. Install plywood or OSB sheathing on the exterior of the wall frames.
C. Roof Framing
Construct a simple gable roof. Use 2x4s for rafters, ensuring proper spacing and support. Attach the rafters to the top plates of the wall frames. Add sheathing to the roof framing, ensuring proper overlap for weather protection.
IV. Roofing, Siding, and Finishing
A. Roofing Installation
Install your chosen roofing material according to the manufacturer’s instructions. Ensure proper overlapping and sealing to prevent leaks.
B. Exterior Siding
Apply chosen siding material over the sheathing, ensuring proper installation and weather sealing. Consider adding trim for a finished look.
C. Door and Window Installation
Install the pre-hung door and windows according to their respective instructions. Ensure proper sealing and weatherstripping.
D. Interior Finishing
Add interior sheathing or paneling as desired. Consider adding shelving and other organizational features to maximize storage space. Apply a sealant or paint to protect the wood and enhance the appearance.
V. Final Inspections and Maintenance
Once construction is complete, conduct a thorough inspection to ensure all components are secure and properly installed. Address any issues before considering the project finished. Regular maintenance, including cleaning and inspecting for damage, will extend the lifespan of your shed.
This guide provides a comprehensive overview of constructing a 6x8 shed. While it aims to be detailed, it is recommended to consult additional resources and adapt the plans based on specific site conditions and personal preferences. Remember that safety should always be the top priority throughout the entire construction process.


No comments:
Post a Comment
Note: Only a member of this blog may post a comment.